

How To Install A Steel Bath
Steel Baths – What Advantages and Disadvantages do They Have Over Acrylic Baths and Cast Iron Baths and how to Install a Steel Bath
In this projection we take a await at steel baths and find out what advantages and disadvantages they have when compared to acrylic baths and cast iron baths in terms of their toll, range of styles and shapes, weight, ease of fitting etc…. Nosotros also evidence you how to fit a steel bath and how to alter whatsoever plumbing pipework if needed such as hot and cold water supplies and waste material pipes.
If you are new to the world of DIY and Home Improvements you might exist thinking that a bath is just a bathroom but in fact there are numerous dissimilar types of bath such as steel baths, acrylic baths and cast atomic number 26 baths and each of these can come up is a range of styles and types including roll peak baths, corner baths, space saving baths and many others.
For the purposes of this project we are going to take a look at the steel bath and find out how information technology compares to the likes of the acrylic bath and besides to the very like cast iron bath.
How practise Steel Baths Compare to Cast Iron and Acrylic Baths?
If you lot are currently looking for a new bath only non sure which blazon to go for and so information technology's ever a skillful idea to kickoff with the master pro'due south and con's of each blazon:
Advantages and Disadvantages of Plastic and Acrylic Baths
- Hold water temperature well
- Low-cal weight and like shooting fish in a barrel to transport and fit
- Bachelor in a huge range of styles, shapes and colours
- Easy to clean and maintain
- Can be cheap to purchase
- Not burn down proof
- Can stain easily
- Non as strong every bit steel or cast iron baths
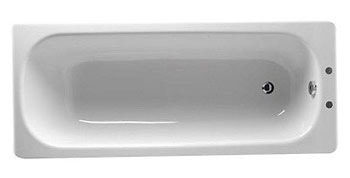
An acrylic or plastic bath
Acrylic baths have many advantages, many of them involving their toll. As plastics and acrylics are cheap to produce and shape, this reflects in the relatively inexpensive prices these baths tin can be produced and this then reflects in the buy price. for buyers.
As plastic is very light weight, the baths themselves are light weight also meaning that they can be easily moved and easily fitted. If fine adjustments are needed to enable the bath to be fitted, so this can easily be done as plastics and acrylic are easy to cut.
Their chief disadvantages are really due to the plastic they are made from. As many benefits as information technology has, plastics and acrylics are quite weak and then can be easily marked and damaged and nether heat and fire, it melts very hands making these baths a potential burn down hazard.
Advantages and Disadvantages of Cast Atomic number 26 Baths
- Great quality and a real focal point for any bathroom
- Sturdy structure making them very long lasting
- Holds heat from the h2o within the bath itself for much longer that other baths
- Tough and difficult wearing
- Very heavy so cannot exist fitted in some locations
- Can be prone to rust
- Express shapes and designs available
- Can be very expensive
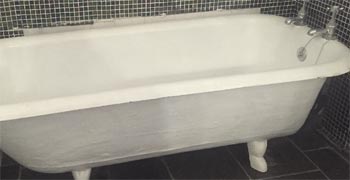
A cast iron bathroom
Bandage iron baths are widely associated with quality and style and can give any bathroom a real impact of course. If looked after and maintained well they tin can last a very long time, in some cases well over a 100 years!
As with the acrylic baths in a higher place, the nature of the materials used for construction provide most of the disadvantages. Cast iron is very heavy and decent size bathroom can weight well over 100KG making them unsuitable for installation on anything other than a solid ground floor in many situations.
Cast iron is also expensive to produce making the baths themselves rather expensive. It is too difficult to shape meaning that the shapes and styles of these types of bath are quite limited.
Advantages and Disadvantages of Steel Baths
- Can retain heat well although take a while to warm up, but however quicker than cast iron
- Great range of modernistic and contemporary styles bachelor
- Sturdy construction, rigid and hard wearing
- Can be reasonably priced if you shop around
- Can be quite bulky and heavy
- If heavy items are dropped on them, this tin flake the enamel blanket
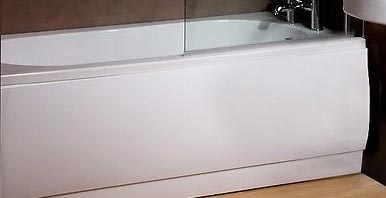
Steel bath
The steel bath is kind of the happy medium between the acrylic and cast iron bath as they accept many of the advantages of both types of bath.
Steel is much lighter than bandage iron only easily as strong and so much of the weight from a bandage iron bath is lost only by using steel instead but without compromising on strength and durability.
As steel is reasonably cheap to produce, the overall end cost is kept right down also, maybe not quite as cheap as an acrylic bath, but not far off.
Steel is besides relatively easy to press and shape so it is possible to produce many different styles and shapes, much more than cast atomic number 26 but may be not quite equally many as plastic.
When comparison a steel bathroom to an acrylic or bandage iron bath
If you are in favour of eco-freindly products and similar to do your bit for the surround when you lot can then a steel bathis a great fashion to go. Steel is a naturally occuring raw material unlike the likes of acrylic that requires fossil fuels to exist burnt. Steel is besides 100% recyclable so once information technology is not needed any more it can be melted downwards and turned in to something else.
How are Steel Baths Made?
In pretty much all cases, steel baths are pressed, or formed, from a sail of steel. In a factory a single sheet of steel is flattened and then put through a series of presses and shapers. The strength and force per unit area produced past these machines can hands curve, stretch and shape the steel.
After the full general shape has been pressed out, the bath is taken through a cleaning process. This is to make sure the surface is absolutely spotless as it needs to exist before an enamel coating can be practical.
A vitreous (of or of the nature of, glass) porcelain enamel blanket is then sprayed onto the steel and the whole affair is fired in a huge kiln to give an enormously potent chemic bail between the steel and the enamel.
Porcelain enamel is the nigh durable, highest quality and sanitary finish bachelor for metal surfaces. Information technology gives a finish which is smoothen and even, is resistant to chipping and scratches, resistant to most chemicals and too fade proof.
As we all know, if metals such as steel are exposed to water for a period of time then it will rust so the enamel also helps to put a barrier between the water and steel and foreclose rusting.
Some other added bonus is that during production, in most cases the adjustable legs that let the bath to sit down on the floor and be adjusted then that it is level are screwed directly to the tub itself.
With acrylic baths yous have to construct a cradle and add together battening to walls etc…. which can be a pain and the feet on bandage atomic number 26 baths (equally they are a feature) are quite frequently stock-still solid so you accept to level out floors which can as well be a pain.
In most cases, as the feet are screwed directly to the base of the tub they can be but screwed up or downwardly to get the bath level, no messing about edifice and leveling frames (in about cases) or using chocks of wood!
How to Install a Steel Bath
Programme Before you Get-go
If you lot are doing a simple like-for-like install eastward.g. swapping your old bath for a new ane and so most of your initial planning will involve measuring your one-time bathroom against your new one to make sure they are roughly the aforementioned size of at least the new one volition fit in the space left past the old.
1 other thing to think virtually where the current waste pipe is and also the existing hot and cold water supply pipes. If your new bathroom is pretty much the aforementioned size (give or accept a centimeter or so) and so all of your existing pipework should friction match up to the taps and plug pigsty of your new bath.
Even so, if you are ripping the whole bathroom out and installing a new ane and also moving things aroung e.g. the bathroom is going where the sink was and the toilet is moving to where the shower used to be etc…. so all of the pipework is going to take to motion as well.
If this is the case and then conscientious planning is needed to ensure that whatsoever and all waste matter pipes tin can still be routed to a waste outlet and the new pipework will provide the correct "fall" to allow both solid and liquid waste to flow towards the drain.
With this in mind information technology is a skilful idea to proceed any soil wastes where they are equally in most cases they will provide the correct gradients to ensure proficient catamenia. In terms of these gradients, this should normally exist betwixt 1:40 (1 in 40) and i:110 (1 in 110). Calculating the correct gradient tin be a tricky task and for more information on doing this, see hither.
One other thing to think about afterwards your wastes is your hot and cold h2o supply. If your existing supply pipes are copper and run directly to your taps, but your new bath is a few inches out of position and so this existing pipework is unlikely to fit. It's no adept merely forcing the pipes in to position equally tis will likely cause leaks.
Instead, this can be easily over come using flexible tap connectors or plastic plumbing fittings and connectors.
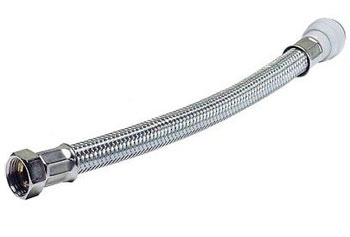
A pushfit flexible tap connector
Existing copper pipes tin simply be cut off (if needed) and a pushfit flexible tap connectors added that can and so be run to each tap. The flexible nature of the pipe allows you about 30 centimeters movement in any direction, making them ideal for awkward spaces or curt adjustments.
Plastic pipework is equally as flexible and piece of cake to apply. Again, using pushfit fittings you lot can just make up brusk runs of pipework to take existing pipe supplies to a new location. It's very easy to use and when connected up correctly is as good as copper pipework.
The final thing to recall about is going to be your flooring. If you are replacing an former acrylic bath with a new steel one so the bathroom itself without any h2o in it is going to be a fair amount heavier than information technology'due south acrylic counterpart, so with this in mind its necessary to check the size and condition of your joists, especially if you lot are installing in a first floor bath.
In terms of the joists, they are going to need to exist stiff plenty to cope with all of that actress weight as y'all certainly don't desire it crashing through the ceiling and ending upwards in your lounge!
The manufacturer should supply specifications in respect to joists in the bath'southward installation sinstructions simply if you lot are in any doubt or they take not been supplied you lot volition need to contact a structural engineer to cheque them for you.
Prepare Floors and Treat Them Before Installation
The start pace is to remove the old bathroom and so start by turning off the water supply to the taps, either at the mains or on each isolation valve if there is one. Remove any bath panels if they are nowadays to access the underside of teh bath then disconnect the waste piping at teh plug and so the taps.
As access to taps tin be catchy, you will probably want to apply a basin spanner to undo the basics holding the taps on.
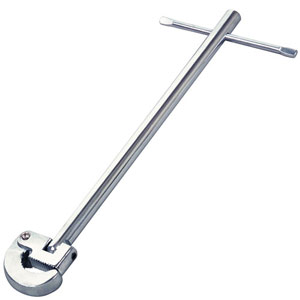
A basin spanner for accessing hard to reach bath taps nuts
With the bath removed and out of the manner have a adept look at the floor, particularly at its status. If you are working with a solid concrete base then the main things yous are looking for are signs of clammy and leaks. The physical surface will be visibly damp if there are probems of this type and there may be mould present.
If so, remove whatsoever mould with a suitable cleaner that really kills it non just removes it and dry teh area as best yous can. This clammy will need to completly dry upwardly or could over time damage the physical. You should still be fine to install the bath, only leave the console off for a adept few days to let air in to dry it out.
If you are installing ona timber flooring, cheque the whole flooring over for damp and rot. Over fourth dimension, even a very occationaly drip can crusade damp and whatever timbers to rot.
Where there is evidence of damp and rot, this will demand to exist removed and replaced with new timbers.
Where your existing timbers are non stiff enough to take the weight of your new bath, these will also need replacing. Equally commented above, the size of timbers required will need to be calculated by a structural engineer.
Subsequently whatsoever and all timbers take been perplaced (including and floor boards or WBP or Marine Form plyboard) information technology's a great idea to requite everything a decent blanket in a expert quality wood preserver such as the Cuprinol 5 Star Wood Treatment seen below. This will continue all timber in practiced status and forbid any future rot harm.
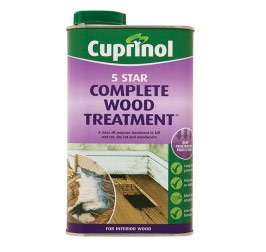
Cuprinol v star wood and timber treatment
Check Bath Against Existing Plumbing Fittings
Once your timber treatment has dried and any new or existing floor boards have been refitted it's fourth dimension to exercise a quick fitting dry run to see how the waste and tap supplies line up. If your new bathroom is the same size and style equally your onetime then it should be pretty much spot on, merely if slightly unlike then some aligning will exist needed.
Using the help of a friend or family member, motility the bath in to place and, firstly, see where the waste matter lies. If it is any more than most 5mm out you are going to have to move the pipework.
In pretty much every case, the waste pipes will be plastic and then they can simply be shortened or lengthened, more than can be found nearly fitting waste pipes and the different fittings in our project hither.
Lengthening a bath waste pipe by adding a department of pipe and solvent welding
With the waste pipage sorted, now it'south time to sort the water supply to the taps. Between this and the waste pipe, tis job should certainly be a lot easier.
If your existing water supplies used copper piping that runs straight to the tap and the tap position in your new bath has not changed then yous should be fine to reconnect them equally they are (if they fit and reach obviously). Apply some wire wool to give the ends a actually good clean and so that any copper is prissy and shiny and then some PTFE tape effectually screw threads and refit the pipework.
In the event that they don't or to get them to fit you have to pull or push the pipes so some adjustments are needed. Making something fit is never a good idea. The pressure and stress that this puts on other fittings can easily cause leaks.
As nosotros take already discussed higher up, flexible tap connectors and plastic pushfit fittings are ideal in this situation. They are very easy to fit and use and can be made to fit all manner of shapes and bends etc….
To notice out more almost plumbing equipment and using pushfit or SPEEDFIT® fittings run into our project folio hither.
If you lot are covering all pipework and the underside of the bathroom in with a bath panel, in some respects, it doesn't matter too much what the pipework looks similar, just then long as information technology doesn't leak. Yet, if you are planning on exposing the underside of the bathroom through a stylistic selection and then sloppy, unattractive pipework is actually going to permit things downward.
In this situation you would certainly want to utilise some nice chrome plated pipework and hibernate all the fittings under the flooring, but for the sake of this projection we are going to assume that you volition be fitting a bath panel, so just make sure nothing leaks and that where possible, pipes are clipped up and secured to a solid surface.
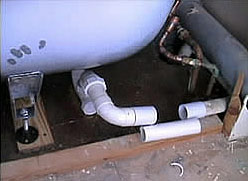
Bath waste material and water supply pipes ready for fitting
Before progressing to the next pace there are a few last items to cover. The first is, if you lot are fitting your bathroom upwards confronting a wall or against 2 walls in a corner then it's a adept thought to fit some crossbar to each of the walls that volition sit only under the lip of the bath. This has a few purposes:
- To aid support the bath and provide some boosted rigidity
- To preclude move of whatever caulk once it's applied every bit this could crusade leaks over time
With the bath in position, mensurate from the nether side of the lip downwards to the flooring at both both ends and both sides (if positioned in a corner). This tin be a flake tight but these measurements need to be accurate.
Now, move the bathroom abroad from the wall and then that you tin can get to it easily and and so measure and marker each point on the wall then joint the points up with a line. The pinnacle of your batten should be fixed level with this line.
If fixing to a plasterboard wall, use decent, secure fixings such every bit toggle fixings or Fischer fixings but if you lot are fixing to brick or blocks, employ suitable screws and rawl plugs.
Once secured in identify, move the bath back in to position and check the fit. Each lip should just be sitting on each batten. If there are slight gaps, don't worry also much as adjustments can be made with the anxiety.
The final task is to now fit your last floor surface. Remove the bath from out of the bathroom to requite yourself some space and and then lay your chosen flooring eastward.m. lino/vinyl, tiles etc…. If laying tiles, just make certain all adhesive and grout has dried before repositioning your bathroom and that the tiles themselves are suitable for taking the weight of the bath.
If you are fitting bath panels then you may be able to get away with out laying your flooring within the panelled area. This is a good idea if laying tiles equally ultimately, the weight of a steel bath that's full of water will probably crack them.
Connect up Waste and Water Supplies
With the flooring laid and any adhesive or grout cured, move the bathroom back in to it's final resting identify. Although a little tricky, it may exist easier to lay on the floor for this, reach underneath and screw your waste material plumbing fixtures to the plug assemply.
Screw it upwards until it is tight and and then compression it upwardly one terminal fourth dimension, just don't overtighten it as this can casue leaks.
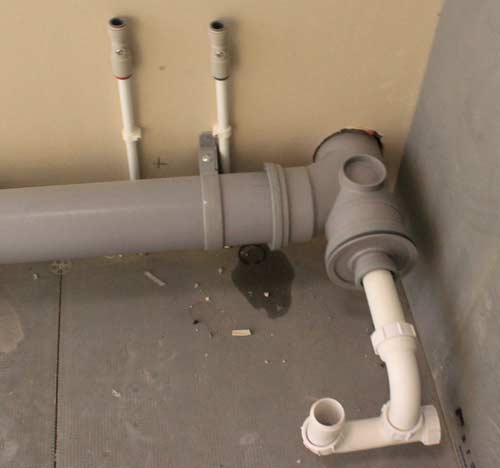
Bath waste connected to newly positioned bath
Now it's time to connect up your h2o supplies. If you are working in a very bars infinite e.thousand. in a corner this can be a bit of a nightmare of a job, and so your basin spanner will come in very handy here.
Offset with the tap furthest abroad (closest to the corner) and using your hand, screw it up equally tight as you lot can equally using your hands, you will have a much better experience for how tight you have managed to spiral it. Then use the basin wrench to do the final tightening. Once this i is fixed, utilise the same technique to practise the 2nd one.
It may be an idea to get a friend or family fellow member to assistance you here as you will need to hold the tap and so that it is cardinal as yous tighten information technology up. If you take to movement information technology to centralise it this tin can easily loosen it.
Bathroom waste product pipe connected to plug waste matter
Level the Bath
Information technology is hugely important that your bath sits as level as information technology possibly can so that when total it doesn't spill over the sides and besides to ensure that when the plug is pulled out all the h2o drains towards the plug and not to the opposite end.
Almost manufacturers suggest that you level their baths and so that they are dead level as during their manufacturering, they are made with a very gradual gradient towards the plug end.
When levelling a bath, this will demand to be done along both its length and width and so that information technology is level all the manner around. With the bathroom saturday correct against any walls and also with the each bathroom lip sitting on any battens, place a spirit level forth the longest border of the bath, closest to the wall.
Ideally, use a iv foot spirit level equally tis will be a little more precise, but if you don't accept one, apply the longest level y'all have.
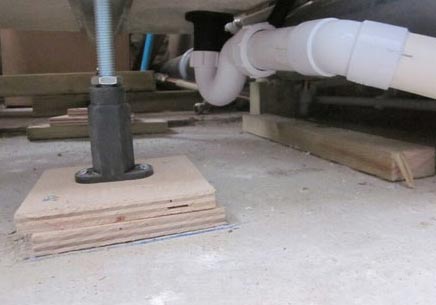
Using a suitably sized spanner, spiral in or out the relevant leg along the back edge of the bath e.one thousand. if it's dipping to the left, spiral the left paw leg out a little and vice versa until information technology is level.
Just continue an eye on the battens and make certain that each lip is sat it's corresponding batten.
Once the back edge is level, move the spirit level to the longest front border and using same process, level it up. One time this edge is level, motion on to the shorter width. If both longer edges are totally apartment so this span should be also, but occationally, some fine adjustments are needed.
This sounds like an piece of cake task but can chop-chop plough into a headache as adjusting one pes, can cause the others to become out of level so just accept your time.
Tiling and Fitting Bath Panels
With your chosen flooring laid and finished and the bathroom now plumbed in and levelled up you can now add the finishing touches – plumbing equipment whatever bath panels and tiles.
If y'all are going with the open programme expect and not fitting any panels then it'south just the tiling you will need to complete.
In terms of the tiling, you have replaced a like-for-similar bath e.1000. both baths are the same size and height then the chances are that whatsoever existing tiles should run pretty much downwardly to the top of the bath. If this is the case then all you are going to demand to do is seal it with some silicone. Data on using sealants and sealant guns tin be constitute in our project here.
If you do need to exercise some tiling such as tile the entire bathroom so in some ways this is really easier than if you lot merely need to fill up a very thin gap between the existing tiles and the top of your new bath.
As ths is quite an extensive subject in itself and needs to be explained in full details nosotros won't become into it in this project but full details tin be institute in our ceramic tiling project hither.
When information technology comes to fitting a bath panel if y'all are going to enclose the underside of the bath and then as with the tiling, a full clarification of the steps involved is needed so that all details are explained in full. Cheque out our how to cut and fit a bathroom panel projection hither.
With the tiling completed and bathroom panel fitted yous have now successfully installed your steel bathroom, now fill information technology upwardly and have a nice long soak! Chore done!

Source: https://www.diydoctor.org.uk/projects/steelbaths.htm
Posted by: graffpecto1994.blogspot.com
0 Response to "How To Install A Steel Bath"
Post a Comment